How to Use a Nakiri Knife - Techniques, Tips, and Care
If you're looking to upgrade your vegetable prep game, a Nakiri knife might be just what you need. This traditional Japanese knife has been trusted for generations—and for good reason. With its straight-edge, rectangular blade, it makes slicing and chopping vegetables faster, cleaner, and more precise.
Whether you are an experienced chef and a home cook, the Nakiri stands out for its consistency and control. Its boxy shape is not only for looks, it assists you in getting uniform, perfect cuts without the rocking motion usual of the Western knives. Once you try it, you’ll see why it’s become a favorite in kitchens around the world.
Let’s break down what makes the Nakiri knife so effective. You’ll learn how to use it properly, pick up a few essential cutting techniques, and even get tips on caring for your knife so it lasts for years. From delicate herbs to firm root vegetables, we’ll cover how to handle it all.
By the end, you’ll not only understand how to use a Nakiri—you might wonder how you ever cooked without one.
What Is a Nakiri Knife?
In Japanese, “Nakiri” literally means “vegetable cutter” or “leaf cutter”—a name that tells you exactly what this knife was made for. Unlike many poetic Japanese knife names, this one is as straightforward as it gets. Originally developed during a time when vegetarian dishes played a central role in Buddhist cuisine, the Nakiri was designed to handle fruits and vegetables with precision and ease.
Over time, the Nakiri knife evolved into a useful kitchen tool. While it is still the go-to blade for prepping ingredients, a lot of cooks now also utilize it for lighter cuts of poultry, meat, and even fish, though it is not designed for cutting through the thick bones.
Whether you're buying your first Nakiri or already own one, it helps to understand the differences between traditional Japanese styles and Western or German-inspired hybrids. Knowing these distinctions can make a big difference when it comes to choosing the right knife and using it effectively. If you’re also curious about knife laws, the discussion around the legal status of butterfly knives reveals some interesting contrasts between utility and regulation.
Let’s have a closer glance at the design:
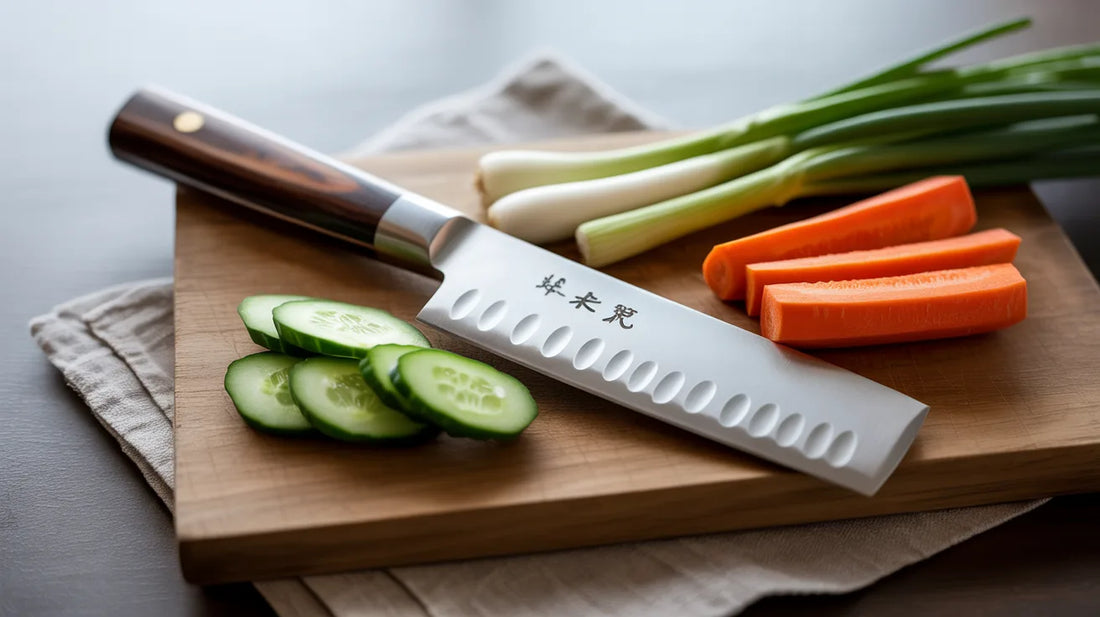
- Blade Shape: It comes with a rectangular blade with the flat cutting edge, perfect for making even, straight cuts through veggies. Its flat profile ensures full contact with the cutting board, which means cleaner slices and less food sticking to the blade.
- Length: Most Nakiris range from 6 to 7 inches. If you prefer longer strokes or already use the rock chop technique, you might opt for a slightly longer blade for added leverage.
- Double-Beveled Edge: Unlike the single-beveled Usuba (another Japanese vegetable knife), Nakiris are sharpened on both sides. It makes them amazing for both left- and right-handed people.
- Balance and Weight: Old-style Nakiris tend to be blade-heavy, which assists with the downward chopping. However, Western-style versions often have thicker blades and heavier handles, giving them a more balanced or even slightly rear-weighted feel.
Because of their square, cleaver-like shape, Nakiris excel at detailed vegetable work—think julienne, brunoise, or allumette cuts. They also handle dense, tough-skinned vegetables like pumpkin, squash, and root veggies with surprising ease.
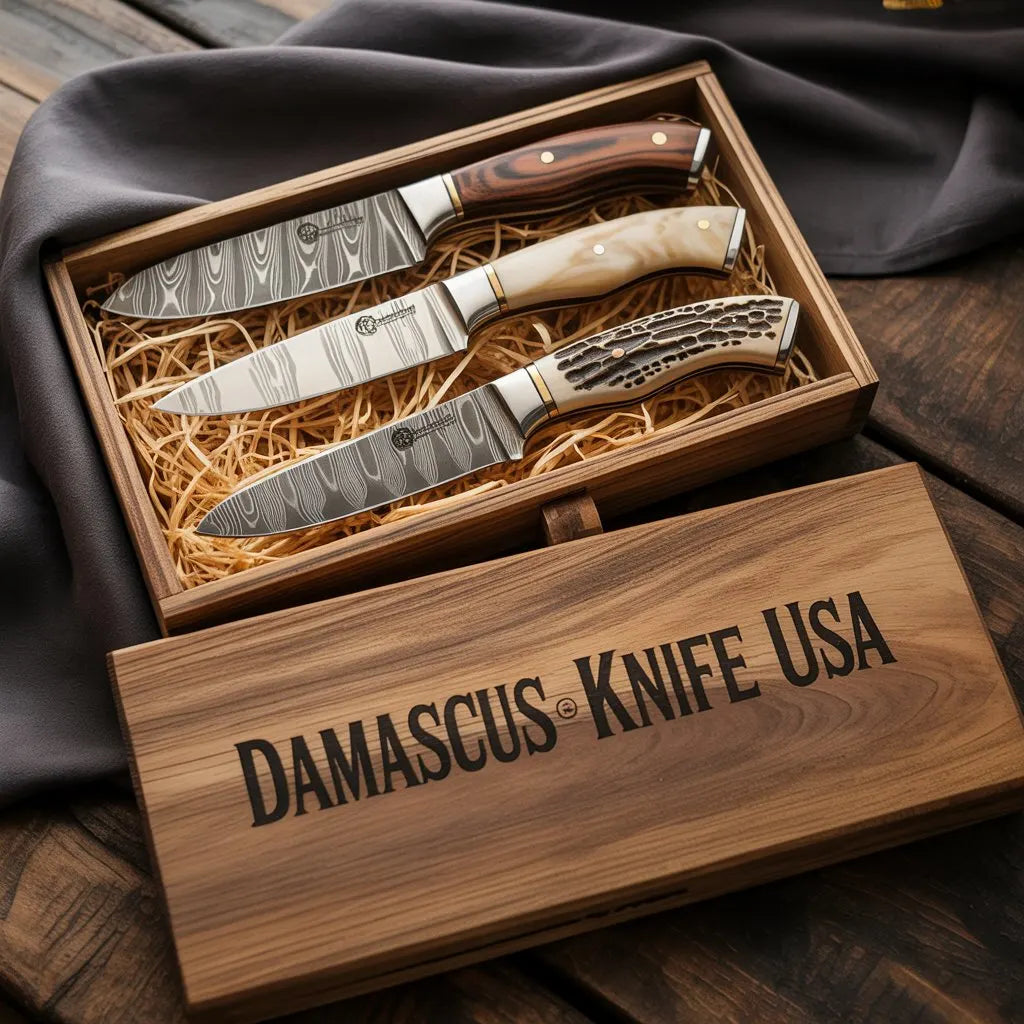
Collectors who admire artistry in blades might also explore the raindrop pattern damascus, a style that blends strength with striking aesthetics.
So whether you're prepping a delicate bunch of herbs or slicing through a butternut squash, a good Nakiri is built to handle the task with precision and efficiency.
Types of Nakiri Knives
At first glance, it might seem like there isn’t much variation when it comes to Nakiri knives—and to some extent, that’s true. Most traditional Nakiris feature a double-beveled edge and a uniform rectangular blade designed specifically for chopping vegetables. But if you dig a little deeper, you’ll find a few notable variations worth knowing about.
Notable Style Differences
One standout version is the Edogata Nakiri, a traditional style used in the Kanto region of Japan, particularly around Tokyo. What makes this knife different is its blade profile—it rises slightly from the heel to the tip, giving it a more forward-leaning shape. It might look unusual compared to the standard flat-top Nakiri, but don’t let that fool you. This design has stood the test of time and performs beautifully in the kitchen.
Alternative Vegetable Knife Styles
While the Nakiri is incredibly versatile, Japan offers a few other vegetable knife styles that serve specific purposes:
- Bunka Knife: Think of it as a Nakiri with an edge—literally. It has a pointed tip that makes it useful for more detailed work or tasks requiring a bit more precision.
- Usuba Knife: It’s a single-bevel knife usually utilized by professional chefs. It has two tip styles: a curved tip or a straight square tip, recognized as the Kamagata Usuba, which appends a little more finesse for the pretty cuts.
All of such styles have its own benefits relying on your cooking requirements and skill level. However, for the majority of home cooks, the standard double-bevel Nakiri is the top all-around option for prepping veggies with accuracy, control, and speed.
Key Distinctions That Set the Nakiri Apart
What makes a Nakiri knife different from other kitchen knives becomes clear when you put it side-by-side with some common alternatives. While it may look a bit like a small cleaver, the way it functions—and feels in your hand—is completely unique.
Nakiri vs. Popular Kitchen Knives
- Nakiri vs. Santoku: While both knives are designed for precision, the Nakiri has a straight, square-shaped blade with a blunt tip, unlike the Santoku’s curved belly and pointed end. The Nakiri’s shape is all about clean, straight-down cuts—perfect for vegetables—while the Santoku is more of a jack-of-all-trades in the kitchen.
- Nakiri vs. Chef’s Knife: A chef’s knife, or gyuto, is typically longer and more curved, making it ideal for the rocking motion many Western cooks are used to. In contrast, the Nakiri’s flat blade means full contact with the cutting board—ideal for quick, efficient veggie slicing without needing to rock the knife back and forth.
- Nakiri vs. Usuba: At first glance, these two may seem similar, and they do share a purpose: both excel at cutting vegetables. But the Usuba is a single-bevel knife, sharpened on just one side, which requires more skill and is typically used by trained chefs. For context on blade traditions, the history of whetstones shows how sharpening stones shaped knife-making techniques across cultures. The Nakiri, on the other hand, is double-beveled—sharpened on both sides—making it more beginner-friendly and perfect for both right- and left-handed users. (Left-handed Usubas can be custom ordered, but they’re less common.)
- Nakiri vs. Cleavers Don’t be fooled by the rectangular shape—Nakiris are much lighter, thinner, and smaller than traditional cleavers. Compared to a Chinese vegetable cleaver or a meat cleaver, the Nakiri has a more compact profile and isn’t built for heavy-duty tasks like chopping through bones. Instead, it’s designed for clean, controlled slicing of vegetables. Think of it as the surgeon’s scalpel, while a cleaver is more like a hatchet.
How to Hold a Nakiri Knife Properly
Holding a Nakiri knife the right way isn’t just about safety—it’s also the key to better control, comfort, and cleaner cuts. One of the most recommended techniques among chefs is the pinch grip, which offers better balance and precision than simply grabbing the handle.
In the beginning, it may feel a bit awkward, particularly if you are accustomed to the traditional grips. But with a little practice, it becomes second nature and you will see how much smoother the prep work becomes.
Hand Placement Techniques
There are 2 common grip techniques you can try:
- Pinch Grip: Place your index finger and thumb on either side of its blade, just above its handle. The remaining fingers wrap around its handle naturally. This grip provides you with more control over the movement of its blade and allows for more precise cuts.
- Hammer Grip: It’s a more acquainted style for newbies. Simply grip the handle the way you would hold a hammer. While it’s easier to learn, it offers less precision than the pinch grip and can cause hand fatigue during longer sessions.
Keeping Your Non-Cutting Hand Safe
Your guiding hand—the one holding the ingredients—plays an equally important role. Tuck the fingertips under and utilize the knuckles as a guide against the knife blade’s side. This claw grip method keeps the fingers safely out of the blade’s way while assisting in pushing the food toward the cuts.
The Role of Posture
Believe it or not, how you stand matters too. Good posture can decrease fatigue and improve control:
- Keep the back straight
- Plant the feet shoulder-width apart for more balance
- Relax shoulders and circumvent leaning over the counter
- And if your cooking style relies on detail work, consider a straight-bladed kitchen knife perfect for precise cuts, ideal for those small and intricate tasks where accuracy matters.
- Position your cutting board at a comfortable height to avoid wrist strain
By combining proper grip, hand safety, and good posture, you’ll not only cut more efficiently—you’ll reduce the chances of injury and enjoy a more relaxed, confident cooking experience.
Basic Cutting Techniques with a Nakiri Knife
Mastering vegetable prep with a Nakiri knife starts with understanding how it’s designed to work. The Nakiri, which translates to “leaf cutter” or “vegetable cutter” in Japanese, is one of the best tools for clean, consistent cuts. Its straight-edge blade and squared-off tip make it ideal for precision work—especially when you're dealing with produce.
Up-and-Down Chopping: The Go-To Technique
The most fundamental way to use a Nakiri is with a straight up-and-down motion. Unlike chef’s knives that rely on a rocking or push-pull movement, the Nakiri performs best when chopped vertically.
Here’s how I like to do it: I start with the knife held horizontally above the cutting board, then bring it straight down through the vegetable in one clean motion. I lift it back up and repeat. This technique works beautifully for everything from carrots and zucchini to bell peppers and cucumbers.
Because the blade is flat, it makes full contact with the board—meaning fewer missed cuts and no accordion-style slices where vegetables are still attached at the bottom.
Push Cutting for Firm or Dense Veggies
When working with denser vegetables like onions or squash, push cutting tends to give you better control. For example, with onions: slice them in half from root to tip, place the flat side down, and push the blade forward in clean, even motions to create uniform slices.
Want perfect diced onions? After making vertical slices from top to bottom, rotate the onion 90 degrees and slice again. The Nakiri's sharp, straight edge makes this process smooth and satisfying.
Pull Cutting for Leafy Greens
Delicate leafy greens—like lettuce, spinach, or cabbage—benefit from pull cutting. The Nakiri’s flat edge glides through without tearing, which helps preserve the texture and freshness of the leaves.
One effective trick: stack several leaves, roll them tightly into a log, and slice horizontally across. This results in beautiful chiffonade ribbons—perfect for salads or garnishes.
Tap Chopping for Herbs
For softer ingredients like herbs, a gentle tap chop works wonders. Stack basil leaves, roll them up, and chop to your desired thinness. For parsley or cilantro, remove the thicker stems and use quick, light taps to finely chop the leaves.
Because of the Nakiri’s precision, you’ll avoid bruising the herbs, which keeps their color and flavor intact.
Bonus Tip: Use the Spine, Not the Edge
Here’s a tip I picked up in my own kitchen: when you’re done chopping, use the spine of the Nakiri—not the sharp edge—to scoop your chopped veggies into a bowl or pan. This simple habit helps maintain the sharpness of your blade over time.
How to Buy a Nakiri Knife
Choosing the right Nakiri knife comes down to understanding your preferences and cooking style. While all Nakiris share a similar shape and purpose, there are key differences in materials, design, and feel that can impact your experience in the kitchen.
Key Factors to Contemplate
Before buying one, take the following into consideration:
- Steel Type: The type of steel matters like with any other quality knife. High-carbon steel blades provide unbelievable edge retention and sharpness, but they need more care to avert staining and rust. Instead, stainless steel is more corrosion resistant and simpler to maintain, making it an amazing option for busy home cooks.
- Handle Style: Do you like a traditional Japanese wa-handle or a Western-style handle? Western handles usually have more ergonomic curves and provide a familiar, solid grip. Wa-handles are lighter, usually cylindrical or octagonal, and lend a traditional, balanced feel to the knife.
- Weight and Balance: Some cooks prefer a heavier knife for a more grounded feel, while others like the nimbleness of a lightweight blade. Lighter knives tend to be easier to maneuver for detailed cuts, whereas heavier options can feel more powerful when tackling dense vegetables.
- Budget: Nakiri knives are available across a wide price range. While premium brands offer craftsmanship and higher-grade materials, there are also excellent mid-range options that deliver great performance without breaking the bank. Consider how often you’ll use the knife and what features matter most to you.
Making the Right Choice
Every choice you make—steel, handle, weight, or price—will shape your experience with the knife. If you’re drawn to razor-sharp edges and don’t mind a bit of maintenance, a high-carbon blade might be ideal. Prefer low-maintenance tools? Go with stainless steel. Love the classic Japanese feel? Try a wa-handle. Want something that feels familiar in your hand? Stick with a Western grip.
The good news is, you really cannot go wrong with a Nakiri, particularly once you comprehend your requirements. Select one that fits your style and you will find yourself using it more than any other knife in the kitchen drawer.
Cleaning and taking care of Your Nakiri Knife
Caring for the Nakiri knife is not much diverse from caring for any top chef’s knife. With proper cleaning, drying, and storage, you’ll keep your blade sharp and rust-free for years to come. Regular maintenance will ensure your Nakiri stays ready to deliver precise, effortless cuts every time you use it.
Proper Cleaning Technique
Think of your Nakiri as an extension of your cooking hand—so don’t let food residue linger on the blade. After every use, wash the knife quickly using a mild soap and warm water. Evade soaking your blade for long periods or harsh detergents, as it can harm its steel.
When clearing chopped vegetables from the blade, try not to scrape the edge directly against the cutting board. Doing so can dull your knife faster over time. Instead, use the flat side or a soft brush to gently remove bits.
The Importance of Thorough Drying
Drying the Nakiri quickly after washing is necessary to prevent rust and other dampness-related damage. Utilize a cloth or soft towel and wipe cautiously, moving from its spine toward its sharp edge. This method helps protect the blade and keeps it in prime condition.
Don’t wait to dry the knife—even stainless steel blades, including high-carbon variants, benefit from immediate drying to maintain their finish and performance.
Safe Storage Practices
Proper storage protects both your knife and your fingers. Avoid tossing your Nakiri loosely into a drawer where it can get scratched or cause accidental cuts.
Instead, consider a magnetic strip mounted in a safe, low-traffic area of your kitchen, or invest in drawer inserts specifically designed to hold knives securely. These choices keep the Nakiri safely stored and simply reachable whenever you require it.
For those interested in tactical performance, learning about navy seal special forces knives offers a unique look into how professionals rely on blades in extreme conditions.
Sharpening The Nakiri Knife
Keeping the Nakiri sharp is necessary for extending its lifespan and maintaining its performance. Like any top knife, regular honing and sharpening guarantee the blade stays precise and ready to handle all the veggie prep effortlessly.
The Role of Whetstones and Honing Rods
Whetstones are the go-to tool for sharpening your Nakiri. They gently remove a thin layer of metal from the blade’s surface, restoring its sharp edge. For Nakiri knives, using whetstones with grit levels around 1000 to 6000 works best. Be sure to maintain the original bevel angle, typically between 15 and 20 degrees for double-beveled blades, to preserve the knife’s sharpness and edge geometry.
On the other hand, ceramic honing rods are ideal for daily upkeep. They don’t remove metal but instead realign tiny teeth along the blade edge that can bend or warp with use. Regular honing keeps your knife slicing smoothly between more thorough sharpening sessions.
Signs Your Nakiri Requires Sharpening
How can you tell when to sharpen it? If the knife slips on smooth surfaces, begins crushing veggies instead of slicing cleanly, or tears ingredients rather than cutting it neatly, these are clear signs its blade is dull and requires some attention.
Consistent Maintenance for Peak Performance
By sharpening and honing your Nakiri properly and consistently, you reduce unnecessary wear and tear, keeping your knife functioning at its best for years. Regular care not only improves your cooking experience but also protects your investment in this specialized kitchen tool.
Common Mistakes to Avoid
When learning to utilize a Nakiri knife, avoiding these common mistakes will assist you in getting the most out of this specific tool.
- Do not utilize it for bones or meat. While it’s possible to cut meat with a Nakiri, it’s not designed for that purpose. Its flat, blunt tip makes tasks like deboning or piercing difficult and unsafe.
- Avoid the rocking motion typical of Western knives. The Nakiri is designed for straight up-and-down cuts. Concentrate on the appropriate hand placement and utilize the pinch grip method for maintaining control.
- Don’t store it loosely in drawers. Tossing your Nakiri in with other utensils can damage the blade and create safety hazards. Always utilize a protective sheath, magnetic strip, or knife block.
- Do not skip maintenance. Regular cleaning using water and mild soap, quick drying and periodic sharpening using whetstones will keep the knife rust-free and sharp.
- Avoid the wrong grip. For safety and better control, pinch its blade between your index finger and thumb while wrapping the other fingers around its handle. This grip reduces fatigue and improves precision.
- Choosing between a Santoku and Nakiri depends on your cooking style. Both are versatile knives, but the Nakiri truly shines when it comes to vegetable prep thanks to its straight blade and flat edge.
Why a Nakiri Knife Is Worth Adding to Your Kitchen
The true value of a Nakiri knife becomes clear once you start using it in your daily cooking. I’ve found that this unique tool has truly elevated my kitchen skills. Its straight, square blade design offers unmatched precision and control, especially when slicing vegetables.
The flat blade provides excellent control, allowing for consistently uniform slices that cook evenly. Whether I’m working with delicate herbs or tougher vegetables like butternut squash, the Nakiri helps me achieve professional-quality cuts every time. This consistency means all pieces cook at the same rate, enhancing the overall flavor and texture of my dishes.
Since I started using my Nakiri, I’ve also seen a noticeable improvement in the presentation of my meals. It makes it easy to create clean julienne and matchstick cuts that add an elegant touch to salads, stir-fries, and more.
For efficient meal prep, the Nakiri has become an indispensable tool. Its design is perfectly suited for quickly and safely chopping everything from soft leafy greens to hard pumpkins. The straight up-and-down chopping motion combined with the sharp blade allows me to work through large quantities of vegetables with ease and confidence.
Conclusion
Mastering the Nakiri knife can truly transform your experience in the kitchen. Its unique design and precision make vegetable preparation simple and efficient. Whether you’re an experienced chef or just starting out, learning to use this tool will elevate your cooking skills to a whole new level.
Comprehending the Nakiri’s distinct characteristics is key; from its flat blade to the squared-off tip, this old-style Japanese knife is designed especially for dicing and slicing vegetables easily. The razor-sharp edge lets you create precise, clean cuts and gorgeously presented dishes each time.
Once you own the Nakiri, good handling is necessary for both control and safety. Utilize a firm grip, curling the fingers under while resting the thumb on the spine of its blade. This technique offers stability and precision, helping reduce the risk of accidents.
With a little practice, you’ll soon be slicing, dicing, and chopping vegetables with confidence and ease, making your time in the kitchen more enjoyable and efficient.
Whether in traditional Japanese kitchens or modern collections, the Nakiri represents precision and heritage. To discover more unique designs, explore our metal damascus selections crafted with the same attention to detail.
FAQs
What’s a Nakiri knife used for?
A Nakiri is perfect for dicing, slicing, and chopping veggies. Its thin blade and flat edge allow for accurate cuts without damaging or crushing the produce.
Can I utilize a Nakiri for meat?
Technically, yes, but it is not the best decision. The Nakiri lacks a sharp tip, making it less appropriate for tasks such as piercing or deboning. It’s designed primarily for vegetables, where it performs best.
How do you properly grip a Nakiri knife?
The recommended grip is the pinch grip. Put your index finger and thumb on either side of its blade close to the handle, while wrapping the remaining fingers securely around its handle. This grip provides the most precision and control.
Is a Santoku knife better than a Nakiri?
It depends on your needs. Both are versatile knives, but Santokus are more all-purpose, while Nakiris are specialized for vegetable preparation. Select the one that fits your cooking style best.